\ All Things Girl Scouts: 2016-03-20

March 22, 2016

Mari: Responsible for What I Say and Do - Orange Petal


Welcome to the Daisy Girl's Guide to Girl Scouting! The main focus of this book for our first and second year girls is the Daisy Petal Patch.  Unlike the badge work for older girls, there are not a whole heck of a lot of guidelines for the petal patches.

Petal Activity #1:  Enjoy Mari's story, and talk about it.
Mari's story is in the Girl's Guide to Girl Scouting.  Mari the Marigold is the fifth petal of ten that you will learn about in this guide.  Mari's petal is about learning what being responsible for what I say and do means.  If you don't have the Girl's Guide to Girl Scouting, you can hear it read here by Troop #5007.


Petal Activity #2:  Act out ways to be responsible throughout the day

We had a lot of fun with this one.  When I did this badge, I had first year daisy's, so they were 5 and 6 years old.  The first thing we did was an open discussion. We talked about responsibility, and what it means in general.

  • Responsibility means that you have a job or obligation to take care of something or someone.  It means you can be trusted to do what is right.  It means you are accountable for what you say, do - your behavior and actions. It means you take ownership in your life.  Can you give me examples of what being responsible means?
    • Some of the answers I got were:
      • I take care of my brother
      • I don't lie
      • When I say I am going to clean my room, I *actually* clean it
After this, I separated them into to two groups, and each group talked about responsibility.  We asked them these questions:
  • What are some ways you are responsible every day?
  • What does being responsible for your words mean?  Can words hurt people?
  • Is it important to keep your promises? Why?
  • How are you responsible for your actions?
  • What new thing could you do to show you are responsible?


Petal Activity #3:  Practice being responsible

For this petal activity, we chose to do a craft.  Our girls, like I noted earlier, were 5 and 6 year old kinder's, so I chose something simple and easy to understand.

I came across this blog post - with a GREAT tutorial - my blessed life: Door Hanger Chore Charts.  This tutorial is on a door hanger chore chart, and it very simple.
Photo from: my blessed life
We did modify this a bit - we used foam door hangers from walmart.  They came in a pack of 10 for about $4, and they did not require any painting.  We also divided it horizontally, instead of vertically.  Lastly, we only had four or five chores, simply because our girls were little.

This was a really excellent craft for our girls - it was simple, easy to understand and use, and really got them excited about pitching in at home.  My little lady still uses hers now, over a year later!

We had a great time with this - not many things cuter than 5 and 6 year olds learning about girl scouts!  Tell me how your Mari the Marigold earning went!


March 20, 2016

Arts and Crafts Fun Patch


One of the MANY great things that girl scouts do, is to complete 'fun' patches.  Fun patches are just that - fun.  They technically have no requirements, and you can purchase them through the council, or through a variety of websites - www.snappylogos.com is a go to for us.

When my girls do a fun patch, our troop implements some rules.  This isn't for everyone, but we really like this process.  We choose a patch, and then we choose 3 requirements to go with it.  One requirement must be a hands on activity, one must be education based, and the third can be whatever they wish.

The patch we will talk about in this post is the arts and crafts fun patch.  As a topic, it's pretty open ended, so I looked for something that would be cute and fun to do.

The three requirements chose were: 
- Get excited about art
- Learn how art benefits people
- Make decorative string ornaments

The first thing we did was 'get excited about art.'  We took a trip to the local art museum - Cameron Art Museum, here in Wilmington, NC.  They have this pretty cool event once a month or so called 'Kids at CAM'.  It is an event that takes place on the weekend, usually Saturday, and lasts a few hours.  The museum hosts an artistic event that allows admission by donation - which makes it extremely affordable for everyone, in all income brackets, to attend.  It is an event designed to inspire creativity in art, and every month uses a different medium - from artistic dance, to food design, to paint, and more.  It is a great time for families AND troops, and got my little ladies very excited and pumped up for art!

The next thing we did was talk about the ways that art benefits people - all people.  I asked my girls to answer 3 questions.
  1. How does art help people?
    1. Art helps people in a variety of ways. For small children - ie. toddlers - it helps lay the foundation for their future education.  For school aged children, it helps expand their imagination.  For adults, it can be relaxing and keep their minds sharp.  It also calms people, makes them happy, etc.
  2. How does art help you?
    1. Everyone will have their own personal interpretation to this question.  For me personally, my art is through music, and creating music allows me to focus, and provides great stress relief.  It makes me happy, and content, and gives me a sense of accomplishment. 
  3. In what new way do you think art could help you?
    1. This question will allow your girls to expand upon and build their awareness of the benefits of art.  If they need guidance, you could say something like, Do you think creating art could help build your self esteem? Or, do you think art can help you express yourself?
The last thing we did was an art project.  It was simple, yet complex enough for the girls to have a need for focus and concentration.  We made a version of yarn ball ornament, or home decor.  

Supplies:
  • Embroidery string
  • Water bottle - one per girl
  • Homemade mod podge (a 1:1 mixture of glue and water)
  • Small 5 in balloons - 9 in balloons are really too much for this. 
  • Cookie sheet lined with parchment paper
  • Drill
  • Tweezers
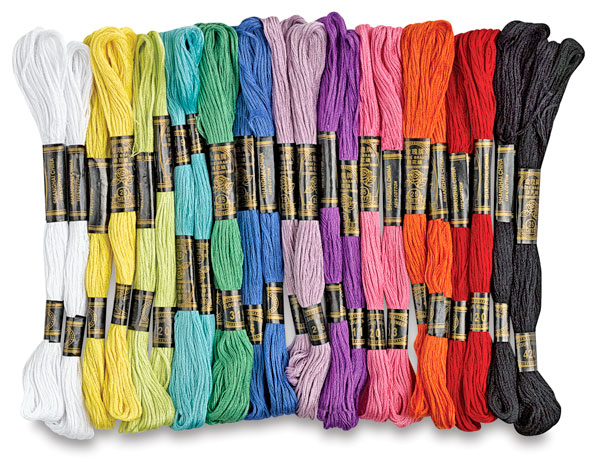
  1. A value pack of embroidery thread works well for this, because there are many colors available.  Have each girl pick one or two colors.  If they just pick one color, they can use the whole skein, and if they pick two, you'll want to help them get 1/2 skein from each color.
  2. Make home made mod podge.  This is a 1:1 mixture of white glue and water and is simple to make.  As you can see, I took a bottle of white glue, and poured it into an empty water bottle.  Then I filled the glue bottle with water and dumped that in too.  We closed the bottle, and my girl shook it up until it was mixed. I would use about 1/4 c per girl, so each 4 oz bottle of glue should be enough for 4 girls.  You'll want to put 1/4 c in each empty bottle. 
  3. This next step is a *LEADER ONLY* step.  Use the drill to drill a small hole in the lid of each water bottle.  I used a 1/8" bit - it doesn't need to be huge - just big enough for the embroidery string to fit through. When you are finished, hand out the lids to the girls. 
  4. Have the girls wind the embroidery thread around two fingers, and the grab one end.  The other end will be shoved into the bottle - it should look like this photo to the right.  **Only do ONE color at a time - repeat steps 4 and 5 if you are doing more than one color**
  5. Each girl will want to thread the piece hanging out of the bottle through the cap of the bottle.  Then they can secure the lid on the bottle.
  6. Next, blow up a balloon for each girl, and hand them out.  Have them start to draw the string
    out of the bottle, and wrap it around the balloon.  It needs to be wrapped pretty securely - nice and tight, because as it dries, it will loosen.  **Don't tie your starting end to the balloon - just hold it down with your finger, otherwise you will have a struggle to remove the balloon at the end.
  7. When you come to the end of the string, just lay it down on the balloon - you wont be able to tell where it begins and ends once it dries.  Everyone can place their balloon on a lined cookie sheet to dry for 24 hrs.  You'll want to rotate them every six hours so they don't end up with any flat sides.
  8. Once they are completely dry, gently pop the balloon, and draw it out with a tweezers.  The end result is a super cute thread ball, that can be placed in a bowl, on a shelf, or hung from the ceiling. 

These took concentration, and sometimes caused failures.  This was good though - while you are working with wet materials, they are very pliable, and easily fixed. Its a good thing for the little ladies to encounter struggle and figure out how to get through it.  In the end, they were all very proud of their decor, and seemed to really enjoy the process.


This craft can *also* be used to complete one of the 4 requirements from the girl guide Craft badge!


If you have any questions, please let me know! I hope your troops enjoy this patch work.  If you try it out, please let me know how it turns out and how you tweaked it to fit your troop! 


Follow my blog with Bloglovin