\ All Things Girl Scouts: Fun Patch
Showing posts with label Fun Patch. Show all posts

September 27, 2016

Coral Patches

Girl Scout 
verb

Being a Girl Scout is something you DO, and it is an EXPERIENCE that no girl should miss!


One day, I was perusing Facebook for further resources pertaining to girl scouts.  I happened to come across a really interesting post in my Facebook group - Girl Scout Troop Leader Connection.  The post was actually kind of distasteful, when I looked more into it.  On the surface, it was a post that said something like, hey check out this cool group - what it really meant was, I need to refer people to this group so I can win something for me, so I am spamming other groups for my own benefit.

ALL THAT ASIDE, when I went to check out the group - Coral Patches - and it was a REALLY COOL group!!  I followed the link to her website - http://www.coralpatches.com/store/ and just looked around.  This site.  You guys. It is awesome.  First and foremost - there are TONS of great resources.  

Let me introduce you to Nicole Sutherland.  She is the creative mind and power behind this site, and she is a doll.  I've spent quite a but of time talking with her, and spitballing, and I am very excited to do a collaboration in the form of a blog post with her.  We have an exciting surprise for you at the end of this post as well! <3 

I am a coffee drinking Girl Scout mom from San Diego who likes Disneyland, making cupcakes, watching football, cooking, crafting, and running marathons. Follow me on Instagram @nic0le for more ideas. ”


— NICOLE
First.  FREE.  There is a large number of FREE resources - I'm talking, download and print at Office Max on the cheap, free. There are awesome, detailed fun patch requirements that you can print for free.  I love this - you all know how we do fun patches in my troop - we have 3 requirements that must be met to earn it - so this was right up my ally.  However, it was also just the TIP of the iceberg.  Nicole has so much more than just patch instructions.  There are resources from super cute planners, to attendance forms.  Cookie sales trackers to calendars.  Kapers charts to badge trackers.  

People. They are gorgeous as well.  Nicole has a great eye for design, and color, and it really shows in her work.  Now - my FAVORITE part of the free printables is that Nicole will absolutely print these items for you.  And yes, there is a cost - but not the etsy cost you've come to expect.  Nicole prints these for a minimal fee ($0.65), on 90lb cardstock, in a flat envelope.  
Click on the photo to check it out!
There are also a variety of other fun things available for purchase for a small cost - patches, stationary, stickers, etc.  I would love for you to pop on over and check her things out.  AND it's probably pretty important that you do - because I am hosting a giveaway.

My readers are girl scout leaders who are selfless, and giving and dedicated. And deserving of a little something fun - so check out the rafflecopter below and enter to win a $20 credit to Coral Patches.  The giveaway runs from now until 12a EST on October 5th.  Enjoy and good luck!

a Rafflecopter giveaway

Did you check out Coral Patches? Did you enjoy it? What are you going to get when you win the $20 credit?


April 12, 2016

Earth Day Fun Patch

One of the MANY great things that girl scouts do, is to complete 'fun' patches.  Fun patches are just that - fun.  They technically have no requirements, and you can purchase them through the council, or through a variety of websites - www.snappylogos.com is a go to for us.


When my girls do a fun patch, our troop implements some rules.  This isn't for everyone, but we really like this process.  We choose a patch, and then we choose 3 requirements to go with it.  One requirement must be a hands on activity, one must be education based, and the third can be whatever they wish.


The patch I will talk about today is the Earth Day fun patch.  Since Earth Day is coming up (April 22nd, 2016) I thought that was most appropriate, though there are other patches that this would work for as well, such as the Earth Smart fun patch, or the Love Our Earth fun patch.  


The three requirements chosen for this patch are:

1.  Read The EARTH Day
2.  Have a solar cook out
3.  Plant a tree


1.  With this patch, we started by reading The EARTH Day, by Todd Parr.  This is a great book for kids - it is well written, and investigates environment protection and conservation.  Daisy's are at a great age to introduce this to our girls - they are learning more about their surroundings, and have more self awareness.  However, this fun patch is a great one for girls of any age.  After we finished reading the book, we talked about it.  The girls each pointed out one thing they remembered and we went over the poster that came with.

This book is filled with knowledge, and simple, easy tips to how to take care of the earth, and make it a better place.  It offers a lot of ideas on how to work together to improve and care for the earth.  The book itself is also eco friendly, made with recycled materials, and non toxic ink.  There is also an insert for this book that folds out into a poster for kids with lots of ideas on how people can go green every day!


2.  The next thing we did was have a solar cook out.  This *can* take a little bit longer, so plan accordingly.  I did try this out with my kids at home so that I would be prepared for the time it took to complete.  It also *HAS* to be done on a sunny day.

A solar cook out is a lesson on environmental lesson, that empowers girls to cook a fun meal in a unique manner.  Each girl (or team - sometimes a team is easier with the smaller ladies) prepares and cooks a simple meal, out in the sun, using solar ovens they created themselves.


Supplies:
  • Carboard boxes - pizza or otherwise (a variety is fun)
  • Aluminum foil
  • Clear tape
  • Plastic wrap 
  • Black construction paper/black painted paper
  • Newspaper
  • Scissors
  • Dowel
  • Sunscreen
  • Food and snack ingredients to make whatever you want to cook
  • An adult to help with cutting
See a great step by step tutorial here on how to make a simple solar oven.  I enjoyed this tutorial, and it was right on the money.  Simple to follow, and easy to use.  

3.  The last step for this patch was to plant a tree.  This is something we really enjoyed, and something families really participated in.  We spent a bit of time talking about the pure importance of trees in this world.  We have one planet, and we need to care for it.  For our planet Earth, trees are essential - they give life.  They take in carbon dioxide, and they emit oxygen.  They provide material for tools, and shelter.  They store carbon.Trees absorb pollutants and clean the air. Trees conserve energy and water, by providing shade.  They can provide food and prevent soil erosion.  They are the worlds natural playground.

Tree seedlings are fairly simple to get, and there are a few ways to obtain them.  You can buy them in bulk from the Arbor Day Foundation - starting at 50 for $39, or just run to your local nursery.  Locally, I have seen seedlings anywhere from $1 to $18 bucks.  I picked up some $2 seedlings that the local experts told me were hardy trees, needed little tending too, and were very hard to kill, since my little ladies were taking these home to their own yards.

**None of my girls live in an apartment complex, but it is a consideration to be aware of - there are many other places to plant trees - businesses, parks, etc.

Make sure you give your parents instructions on how to healthily plant a tree.  They will need to shovel out a round hole that is about 3 times wider than the root ball.  The root ball should just peek out of the hole.  Absolutely use a measure tape or ruler if you are unsure.  **REMIND your parents that anything over a foot deep, they need to call the city about first.  It is VERY simple - you call, and within 48 hours, the various companies send people out to mark their lines**    Pat down the soil in the bottom of the hole firmly - this will support your tree when it is planted.  Remove any twine or string on the root ball, and fold down the burlap, if there is some.  You should just see the root ball peeking out of the hole.  Fill the hold, and pat down the soil.  Then form a ring around the base of the tree - this will catch water, and let it gather there to keep the roots drenched.  At this point, you can add mulch if you prefer, but be careful to leave a mulch free ring to a few inches around the tree so the trunk doesn't get covered.  If the trunk is weak, you can tie it to a stake to support it. Wrap the base of the tree to protect it - from an inch or two off the ground, to right below the lowest branch.  That's all there is too it - dont forget to water your tree so it will thrive!

Make sure you pledge to plant your tree here!

I hope you enjoyed this tutorial! If you do this badge, please tell me about it! How did it go - did you do it the same, or tweak it a little? I love hearing about other's experiences. 


April 5, 2016

Healthy Habits Fun Patch

One of the MANY great things that girl scouts do, is to complete 'fun' patches.  Fun patches are just that - fun.  They technically have no requirements, and you can purchase them through the council, or through a variety of websites - www.snappylogos.com is a go to for us.


When my girls do a fun patch, our troop implements some rules.  This isn't for everyone, but we really like this process.  We choose a patch, and then we choose 3 requirements to go with it.  One requirement must be a hands on activity, one must be education based, and the third can be whatever they wish.


The patch this post is about is the healthy habits fun patch.  My girls are 5 and 6, and this is a great patch to do at this age.  They are becoming more independent in these areas of life, and giving them the knowledge to make healthy decisions will benefit them for a long time to come!

 The three requirements chosen for this one were:

-  General Healthy Habits
-  Making a Healthy Smoothie  
-  Healthy Eating Pledge 

The first thing I did for this badge was that I asked the girls these questions:
  1. What is health?
  2. What does it mean to be healthy?
  3. Why do we want to be healthy? Why is it important?

After that, we took a 
look at this infographic and talk about being healthy.  We went over the bullets on this infographic, and talked about *why* those things are healthy.

For the second requirement, we did just that - we made a healthy smoothie.  I have a nutra bullet, so this made this task pretty simple - I just brought it along to the meeting.  To make this step more exciting, I selected a variety of items for this step.  I had them all out displayed, and asked the girls to first choose what the healthy options were, then to select, as a group, what we would put in our smoothie.  I didn't want to mess with a *lot* of smoothie, so I just grabbed some dixie cups and gave each girl a small bit.

The items I brought were: 

  • Apple
  • Banana
  • Clementine
  • Strawberries
  • Carrots
  • Girl Scout Cookies
  • White Sugar
  • Honey
  • Processed Juice
  • A juiced apple
  • Snickers
  • Hershey Chocolate
The girls really enjoyed creating something themselves, and this showed them that they can choose a variety of healthy items and make something delicious.

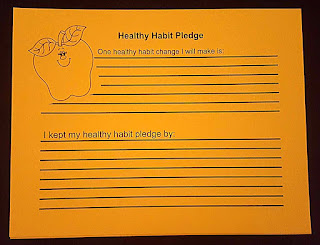
The last part of this meeting was a healthy habit pledge.  After much discussion about healthful habits, the girls were armed with ideas on how to make their own live healthier.  I created this fun pledge sheet, and you can get a printable copy of it by clicking this link.


I had the girls write down *ONE* thing they would like to change in their lives to make them healthier, happier little people.  Our plan is to start our next meeting with this sheet as well, so they can write down what they did to keep their pledge. 

I hope you enjoyed this tutorial! If you do this badge, please tell me about it! How did it go - did you do it the same, or tweak it a little? I love hearing about other's experiences. 

March 27, 2016

Baking Fun Patch


One of the MANY great things that girl scouts do, is to complete 'fun' patches.  Fun patches are just that - fun.  They technically have no requirements, and you can purchase them through the council, or through a variety of websites - www.snappylogos.com is a go to for us.

When my girls do a fun patch, our troop implements some rules.  This isn't for everyone, but we really like this process.  We choose a patch, and then we choose 3 requirements to go with it.  One requirement must be a hands on activity, one must be education based, and the third can be whatever they wish.

The patch we will discuss in this post is the Baking Fun Patch.  The girls felt a need to create - really, who doesn't want to create something, some way.  This was a fun patch to do, and offered a lot of variety within it, so the girls could experiment and make their own designs.

The three requirements the girls chose for this one were:
- Baking Safety Guidelines
- Sampling a variety of baking ingredients
- Bake cupcakes in a jar

We started this patch work, most appropriately, with baking safety guidelines.  I first asked the girls what kind of safety guidelines they knew, and then handed out a small cheat sheet to each girl.
The gist of it is, wash everything, be safe, and bake with an adult.  These girls are 5 and 6, so these are pretty all encompassing guidelines.  I did find some other great sources for more detailed guidelines for older children.  You can find them here:

The next thing we did was sample a variety of baking ingredients.  This doesn't have a purpose beyond letting the girls familiarize themselves with a variety of ingredients.  This is likely the first foray into the kitchen for many of your girls, and tasting or sampling is a great way to learn about these things.  We used this template, and sat the girls around a table.  They each got a cute little set of measuring spoons from the dollar store, and used them to take a little bit of each item on the list. 
 Things listed were ingredients such as vanilla extract, brown sugar, and chocolate chips.  We had each girl taste a small bit (emphasis on small - some of these are pretty bitter and not tasty!)  Then they used some of the senses to describe the ingredient - taste, touch and smell.
This was a great experience - the girls really delved into the ingredients and discussed them in depth.  It was a lot of fun to watch, and the girls really became familiar with many of the most common baking ingredients.

The last task on our list was to bake cupcakes in a jar.  This was a GREAT experience with the girls - they really enjoyed baking AND the cupcakes were baked in a jar, which made them SO simple to take home. 

Supplies: 
  • 1 Box of White Cake Mix (and ingredients needed for it)
  • Food Coloring
  • Empty Baby Food Jars
  • Sprinkles
  • Whip, in a Can
  • Cookie Sheets
  • 1 Large Bowl
  • 6 Small Bowls
You can use cake mix from scratch, but I have Daisies, so it's in everyone's best interest in my troop to have the simplicity of a box mix!

Our colored cake mix!


1.  Mix the box cake mix, according the the instructions on the box.  Once you've finished with this, scoop the batter into 6 separate bowls.  
2.  Each bowl is going to have a different color - we chose the colors of the rainbow this time, but I also liked the idea of shades of blue (since we are daisy's).  This was a LOT of fun for my first graders - they really enjoyed dropping the colors into the and mixing them to make a variety of colors. 


3.  Next, fill the jars with the cake mix.  Mix, layer and swirl the colors for fun designs.  I put each color in a large ziploc (like you would for frosting) and cut the corner off, so the girls could just squeeze the cake batter into their baby food jars.  My girls were *very* creative!


4. Place the baby food jars on a cookie sheet and bake the jars (baby food jars are tempered, so they won't have an issue in the oven) for the appropriate cupcake time.  
**The one thing we DID learn, a little to late, is that you CANNOT fill the jars as full as we filled them in the first and second jar in this picture...because it bakes over! LOL!**


5.  With the excess cake batter that baked over, we just lopped it off (leveled it), and set it aside. Set the cupcakes aside to cool, once they have been leveled. 
6.  The final step for the cupcakes is to top with whip and sprinkles.  It made a super cute, super simple cupcake the girls could take home, and was a great serving size!


7.  Since we are girl scouts, we didn't want to wast anything, so once we were done with all the cupcakes, we decided to have a taste of cupcakes - and we took the part we cut off earlier, and added some whip and sprinkles to it! 


I hope you enjoyed this tutorial! If you do this badge, please tell me about it! How did it go - did you do it the same, or tweak it a little? I love hearing about other's experiences. 


March 20, 2016

Arts and Crafts Fun Patch


One of the MANY great things that girl scouts do, is to complete 'fun' patches.  Fun patches are just that - fun.  They technically have no requirements, and you can purchase them through the council, or through a variety of websites - www.snappylogos.com is a go to for us.

When my girls do a fun patch, our troop implements some rules.  This isn't for everyone, but we really like this process.  We choose a patch, and then we choose 3 requirements to go with it.  One requirement must be a hands on activity, one must be education based, and the third can be whatever they wish.

The patch we will talk about in this post is the arts and crafts fun patch.  As a topic, it's pretty open ended, so I looked for something that would be cute and fun to do.

The three requirements chose were: 
- Get excited about art
- Learn how art benefits people
- Make decorative string ornaments

The first thing we did was 'get excited about art.'  We took a trip to the local art museum - Cameron Art Museum, here in Wilmington, NC.  They have this pretty cool event once a month or so called 'Kids at CAM'.  It is an event that takes place on the weekend, usually Saturday, and lasts a few hours.  The museum hosts an artistic event that allows admission by donation - which makes it extremely affordable for everyone, in all income brackets, to attend.  It is an event designed to inspire creativity in art, and every month uses a different medium - from artistic dance, to food design, to paint, and more.  It is a great time for families AND troops, and got my little ladies very excited and pumped up for art!

The next thing we did was talk about the ways that art benefits people - all people.  I asked my girls to answer 3 questions.
  1. How does art help people?
    1. Art helps people in a variety of ways. For small children - ie. toddlers - it helps lay the foundation for their future education.  For school aged children, it helps expand their imagination.  For adults, it can be relaxing and keep their minds sharp.  It also calms people, makes them happy, etc.
  2. How does art help you?
    1. Everyone will have their own personal interpretation to this question.  For me personally, my art is through music, and creating music allows me to focus, and provides great stress relief.  It makes me happy, and content, and gives me a sense of accomplishment. 
  3. In what new way do you think art could help you?
    1. This question will allow your girls to expand upon and build their awareness of the benefits of art.  If they need guidance, you could say something like, Do you think creating art could help build your self esteem? Or, do you think art can help you express yourself?
The last thing we did was an art project.  It was simple, yet complex enough for the girls to have a need for focus and concentration.  We made a version of yarn ball ornament, or home decor.  

Supplies:
  • Embroidery string
  • Water bottle - one per girl
  • Homemade mod podge (a 1:1 mixture of glue and water)
  • Small 5 in balloons - 9 in balloons are really too much for this. 
  • Cookie sheet lined with parchment paper
  • Drill
  • Tweezers
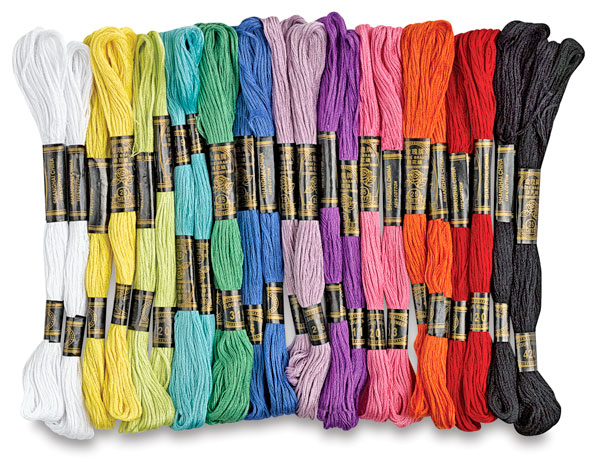
  1. A value pack of embroidery thread works well for this, because there are many colors available.  Have each girl pick one or two colors.  If they just pick one color, they can use the whole skein, and if they pick two, you'll want to help them get 1/2 skein from each color.
  2. Make home made mod podge.  This is a 1:1 mixture of white glue and water and is simple to make.  As you can see, I took a bottle of white glue, and poured it into an empty water bottle.  Then I filled the glue bottle with water and dumped that in too.  We closed the bottle, and my girl shook it up until it was mixed. I would use about 1/4 c per girl, so each 4 oz bottle of glue should be enough for 4 girls.  You'll want to put 1/4 c in each empty bottle. 
  3. This next step is a *LEADER ONLY* step.  Use the drill to drill a small hole in the lid of each water bottle.  I used a 1/8" bit - it doesn't need to be huge - just big enough for the embroidery string to fit through. When you are finished, hand out the lids to the girls. 
  4. Have the girls wind the embroidery thread around two fingers, and the grab one end.  The other end will be shoved into the bottle - it should look like this photo to the right.  **Only do ONE color at a time - repeat steps 4 and 5 if you are doing more than one color**
  5. Each girl will want to thread the piece hanging out of the bottle through the cap of the bottle.  Then they can secure the lid on the bottle.
  6. Next, blow up a balloon for each girl, and hand them out.  Have them start to draw the string
    out of the bottle, and wrap it around the balloon.  It needs to be wrapped pretty securely - nice and tight, because as it dries, it will loosen.  **Don't tie your starting end to the balloon - just hold it down with your finger, otherwise you will have a struggle to remove the balloon at the end.
  7. When you come to the end of the string, just lay it down on the balloon - you wont be able to tell where it begins and ends once it dries.  Everyone can place their balloon on a lined cookie sheet to dry for 24 hrs.  You'll want to rotate them every six hours so they don't end up with any flat sides.
  8. Once they are completely dry, gently pop the balloon, and draw it out with a tweezers.  The end result is a super cute thread ball, that can be placed in a bowl, on a shelf, or hung from the ceiling. 

These took concentration, and sometimes caused failures.  This was good though - while you are working with wet materials, they are very pliable, and easily fixed. Its a good thing for the little ladies to encounter struggle and figure out how to get through it.  In the end, they were all very proud of their decor, and seemed to really enjoy the process.


This craft can *also* be used to complete one of the 4 requirements from the girl guide Craft badge!


If you have any questions, please let me know! I hope your troops enjoy this patch work.  If you try it out, please let me know how it turns out and how you tweaked it to fit your troop! 


Follow my blog with Bloglovin