\ All Things Girl Scouts: Badge
Showing posts with label Badge. Show all posts

July 25, 2016

Money Counts: Daisy Leaf

Money Counts: Daisy Leaf


Welcome to the Daisy Girl's Guide to Girl Scouting!  The main focus of this book for our first and second year girls is the Daisy Petal Patch set.  Unlike the badge work for older girls, there are not a whole heck of a lot of guidelines for the petal patch set.  

The leaf badges are a great compliment to the product sales, whether it be cookies or fall products.  We did ours with our cookies sales, but in the end, you could do this anytime it fit in your schedule.

Leaf Activity #1:  Understand different kinds of coins

The first two parts of this were very similar - I did this with my girls at the beginning of cookie season, so I grabbed our bank bag of cookie money and basically dumped it out in front of them.  We spent some time identifying the different coins and their values.  My girls were in kindergarten so they needed some help and reminding.  We also put them in order and talked a bit about which ones were worth more, and what kind of things we could buy with their change.


Leaf Activity #2: Know more about paper money

The first two parts of this were very similar - I did this with my girls at the beginning of cookie season, so I grabbed our bank bag of cookie money and basically dumped it out in front of them.  We spent some time identifying the different paper bills and their values.  My girls were in kindergarten so they needed some help and reminding.  We also put them in order and talked a bit about which ones were worth more, and what kind of things we could buy with their money.


Leaf Activity #3: Find out the cost of fun


Things you'll need:
  • popsicle sticks
  • general info on local attractions

This was my favorite part of this badge.  For this badge, I gave the girls a budget of $10 per person, and two event options.  One was the local zoo, and the other was a meal at a fast food restaurant and time at a large park.  My girls chose the zoo.  I had 7 girls, which meant they needed 2 chaperones.  I gave my girls 90 popsicle sticks ($90), and some paper.  On the paper, I wrote:

Admission: $6, unless they have an annual pass
Lunch: $3
Snack: $3
Souvenir: $5
Train Ride: $3
Horse Ride: $4

I gave them just a few rules.  

1.  Admission was a *must*
2. Everyone had to eat.
3. If one person got a souvenir, everyone got a souvenir.

I explained that each popsicle stick was $1 - they could spend all of the popsicle sticks they had, but not more than that.  Then I let them go to town.  This was super endearing to watch - the first thing they decided to do was basically everything on the list!  We offered some gentle guidance and suggested they take care of the admission cost first, and then see where they were at with their funds. My girls took a survey of the girls and leaders to determine who had annual passes - turns out 3 girls and one leader had passes.  After this, they tackled lunch.  They liked the idea of buying lunch at the zoo, but one enterprising little lady asked if it would be cheaper to bring PBJ sandwiches and water bottles for everyone.  We estimated that would cost about $10.  After admission and lunch were taken care of, they had $50 bucks left to play with.  This was actually much more than I had expected, so this was great.  The girls talked about a souvenir, but they deemed it far to expensive for them, and (after all) the zoo was in their home town - they could spend time there whenever they wanted.  The girl were split on train rides and horses, so they voted, and split up the chaperones.  The chaperon with the train ride would need to ride but the horse one could just watch. At this point, they had $22 left.  They decided to get snacks with their money, and specified they would get popcorn, and each person would share with their buddy.  We ended up getting 4 fictional popcorns.  

Cost of our *fictional* zoo trip:

Admission: $30
Lunch: $10
Train: $12
Horse: $16
Snack: $12

Total: $80

The girls learned a valuable lesson on how much fun costs, and how to budget for it.  They also returned $10 bucks back to the troop account - for our next fun activity.

We had a great time with this - not many things cuter than 5 and 6 year olds learning about girl scouts! Tell me how your Money Counts leaf earning went!




July 21, 2016

Displaying Badge Work


When we moved to our current city, we moved cross country in the dead of winter.  My girl and I adore girl scouts, and it has been a fantastic way to meet friends for both my girl and myself.  We knew we wanted to jump right into scouts.

Every girl scout mom knows that joining a new group comes with some financial obligation, and girl scouts is no different.  My current troop formed in the middle of the school year - right at the start of the cookie season.  My girls were AMAZING and jumped right into cookie season, and off we went.

As time went on, and the girls began to earn petals, we considered some cost effective ways to display petals.  My daughter was the only girl who had previously been a scout, so I had quite a few girls who did not have a daisy bib, and moms were reluctant to spend all that money on a daisy bib when my girls would be bridging shortly.


I reached out to my mom friends, and one of my girlfriends (Thank you Cella!) showed me the ingenious idea of getting troop shirts, and ironing/sewing the petal patches on there.  This is a great idea - it gives the girls a chance to display the badges they've earned without dipping too deeply into our parents pockets!

What creative ideas have YOU used to display badge work? I love to see comments, and posts sharing your creativity!


May 19, 2016

Event Planning with DAISY's!


Every leader has to, at some point, plan an event.  The participation level of said leader should *theoretically* be minimal, however with the smaller girls, that can be a struggle.  They need a bit more guidance, and are really still learning what it means to plan an event.

Today I will discuss the technique I've found that works really well with my littlest girls, empowering them to plan their own events while giving me some control of the situation so we don't end up with girls planning a bridging ceremony complete with ponies, ice cream and helicopter rides lol!

When my Daisies plan an event, we break it down into 3 parts - beginning, middle, and end.  This is a pretty easy process for the youngest girls to understand.  We use meeting time to plan events, and I come prepared.

Most recently, we planned out bridging ceremony.  I use foam sheets for our planning - just because they are fun.  You could use anything from regular paper to a tablet - just as long as the girls can visually appreciate it.  The process will go smoother if they can SEE what they are planning.

I start with 3 pieces of foam sheets, and they look like this:


Once I get the three basic parts on their own foam sheet, I break down those parts individually.  I like to piece out 2 or 3 parts that can be specifically planned out for each portion of the event.  I also add a space for notes on the bottom - historically, I've learned my little ladies often have many *tips* or advice for me regarding the events we plan.


In terms of breaking down each portion, the example I am using in this post is our upcoming bridging ceremony.  The beginning section of this event planning was broken down into 3 parts - opening, Emcee, and short speech.  Since I have Daisy's, my girls are all 5 years old to 7 years old.  Some of them are great at coming up with options, or choices, and some struggle.  Because of this, I generally put two or three choices, and then introduce them as a choice to the girls. We discuss each one, and the implications, and then the girls take a vote on which they prefer.


Since the outline is already set up, its fairly easy to just highlight, circle or underline the choices the girls make.  I also open the dialogue up to any notes or suggestions the girls have - they are usually pretty entertaining, as well as helpful! The photo to the left is a great example of the finished product.


In the end, you have a three page outline that is simply written, and easy to understand for your event.  I generally make foam sheets in the same manner for other items that need planning as well - for instance, our bridging ceremony will be a potluck style picnic, so we have a sheet for sides/appetizers, and main dishes as well in a similar style.

As the girls age, I imagine this will evolve to them handling all of the details, but at this point in time, this is a really effective, and simple way to plan their events thus far.

We had a great time with this - not many things cuter than 5 and 6 year olds planning a bridging ceremony!  Tell me how your event planning went!


March 28, 2016

Gloria: Respect Myself and Others - Purple Petal


Welcome to the Daisy Girl's Guide to Girl Scouting!  The main focus of this book for our first and second year girls is the Daisy Petal Patch.  Unlike the badge work for older girls, there are not a whole heck of a lot of guidelines for the petal patches.

If you want to print off a picture of the Gloria for the girls to color during the gathering time, you can find one here!

1.  Enjoy Gloria's story and talk about it

Gloria's story is in the Girl's Guide to Girl Scouting.  Gloria the Morning Glory is the sixth petal of ten that you will learn about in this guide.  Gloria's petal is about learning what it means to respect yourself and others.  If you don't have the Girl's Guide to Girl Scouting, you can hear it read here by Troop #5007.

Other appropriate books to enjoy and discuss in lieu of Gloria's story:
I'm Gonna Like Me by Jamie Lee Curtis

The Golden Rule by Ilene Cooper
I Won't Comb My Hair by Annette Langen

2.  Invite an older girl scout to talk to your group about ways to respect yourself and others.

This is a great opportunity for an older scout to fulfill requirements for bridging or other badge work.  It's a good time to reach out to your network of leaders to see if anyone has a girl who'd like to take a few minutes to share with your troop.  You could also ask your girls, and families, if any of them are or were girl scouts, and ask them to talk to the girls.  My troop had my sister come and chat for a bit, but my girlfriend's troop had a grandmother come and not only talk about ways to respect yourself and others, but also share a bit about girl scouting 50 years ago!

3. Practice respecting myself and others

One activity for this is a healthy snack.  Discuss the importance of healthy eating for a healthy body, and then tell your girls you will be making a healthy snack today.  My favorite is a smoothie, and it can be done simply with a bullet or similar blender that is easily transported.  

Ingredients:

  • Strawberries
  • Bananas
  • Clementines
  • Honey
  • Ice
  • Juiced Apple Juice
  • Any other fruit you, or your girls may like to try

**I juice an apple for this so I can add some liquid that is all natural - you can definitely use whatever juice or water you like.**

1.  Plug in blender, and peel 1 banana, 2 clementines and cut the greens off of 5 strawberries.
2.  Toss fruit in blender.  Add a squeeze of honey, and about 1/4 cup of apple juice. 
3.  Put a handful of ice cubes in - I use 5 ice cubes.  Its important that the ice goes last (if you invert the container to blend) or first (if using a traditional blender) so that the ice is the first thing to hit the blade.
4.  Blend, and pour.
I also encouraged my girls to add in or take out any fruit that met their desire.  We had a large variety of smoothies, but they were all tasty.

Another very cool activity is one that stresses the importance of hand washing.  I love this simple experiment that shows how easily germs are spread.

Supplies:
  • Glo germ or some similar substance 
  • Black light or UV light
1.  Open this experiment with a short discussion about the health benefits of hand washing.  Explain that this experiment will show what happens if we don't wash our hands, and discuss proper hand washing technique.

Open Dialog:
  1. Do you think you wash your hands well enough?
  2. How does illness spread?
  3. When should you wash your hands? 
2.  Apply the powder (or gel - it comes in both forms) thoroughly to your girls hands.  Make sure it's worked into both sides of the hands, and into all the creases.  This is when I explain how the powder works - this powder is made of fluorescent material, and we can't see them without a UV light, and that is similar to how germs cannot be seen by the naked eye.  In this experiment, the powder will symbolize germs.

3.  This step will look different for everyone, depending on what they choose to do.  I had 6 girls, and I split them into two groups.  One group (GROUP A) had 3 girls, and only ONE had the powder worked into her hands.  She then shook hands, held hands, high fived - however they wanted to interact - with the other two girls.  The other group (GROUP B) had 3 girls, and each girl had powder applied.  These girls performed normal daily tasks - one drank from a cup, one used a pencil to do homework, and one played with a toy.  

4.  Hold the black light up to all affected surfaces.  With GROUP A, talk about how ONE girl had germs, and didn't wash her hands, and ask the girls to notice how those powder transferred to the other girls.  With GROUP B, look at the cup, writing utensil, and toy, and ask the girls to notice how the powder transferred.

5.  Ask the girls to head to the sink, and wash their hands appropriately.  When they are done, look at their hands under the black light again.  There will be spots they missed - this should be related back to how we can miss germs if we don't use proper hand washing technique.  This is a great time to reinforce that proper technique.


We had a great time with this - not many things cuter than 5 and 6 year olds learning about girl scouts! Tell me how your Gloria the Morning Glory earning went!


March 27, 2016

Baking Fun Patch


One of the MANY great things that girl scouts do, is to complete 'fun' patches.  Fun patches are just that - fun.  They technically have no requirements, and you can purchase them through the council, or through a variety of websites - www.snappylogos.com is a go to for us.

When my girls do a fun patch, our troop implements some rules.  This isn't for everyone, but we really like this process.  We choose a patch, and then we choose 3 requirements to go with it.  One requirement must be a hands on activity, one must be education based, and the third can be whatever they wish.

The patch we will discuss in this post is the Baking Fun Patch.  The girls felt a need to create - really, who doesn't want to create something, some way.  This was a fun patch to do, and offered a lot of variety within it, so the girls could experiment and make their own designs.

The three requirements the girls chose for this one were:
- Baking Safety Guidelines
- Sampling a variety of baking ingredients
- Bake cupcakes in a jar

We started this patch work, most appropriately, with baking safety guidelines.  I first asked the girls what kind of safety guidelines they knew, and then handed out a small cheat sheet to each girl.
The gist of it is, wash everything, be safe, and bake with an adult.  These girls are 5 and 6, so these are pretty all encompassing guidelines.  I did find some other great sources for more detailed guidelines for older children.  You can find them here:

The next thing we did was sample a variety of baking ingredients.  This doesn't have a purpose beyond letting the girls familiarize themselves with a variety of ingredients.  This is likely the first foray into the kitchen for many of your girls, and tasting or sampling is a great way to learn about these things.  We used this template, and sat the girls around a table.  They each got a cute little set of measuring spoons from the dollar store, and used them to take a little bit of each item on the list. 
 Things listed were ingredients such as vanilla extract, brown sugar, and chocolate chips.  We had each girl taste a small bit (emphasis on small - some of these are pretty bitter and not tasty!)  Then they used some of the senses to describe the ingredient - taste, touch and smell.
This was a great experience - the girls really delved into the ingredients and discussed them in depth.  It was a lot of fun to watch, and the girls really became familiar with many of the most common baking ingredients.

The last task on our list was to bake cupcakes in a jar.  This was a GREAT experience with the girls - they really enjoyed baking AND the cupcakes were baked in a jar, which made them SO simple to take home. 

Supplies: 
  • 1 Box of White Cake Mix (and ingredients needed for it)
  • Food Coloring
  • Empty Baby Food Jars
  • Sprinkles
  • Whip, in a Can
  • Cookie Sheets
  • 1 Large Bowl
  • 6 Small Bowls
You can use cake mix from scratch, but I have Daisies, so it's in everyone's best interest in my troop to have the simplicity of a box mix!

Our colored cake mix!


1.  Mix the box cake mix, according the the instructions on the box.  Once you've finished with this, scoop the batter into 6 separate bowls.  
2.  Each bowl is going to have a different color - we chose the colors of the rainbow this time, but I also liked the idea of shades of blue (since we are daisy's).  This was a LOT of fun for my first graders - they really enjoyed dropping the colors into the and mixing them to make a variety of colors. 


3.  Next, fill the jars with the cake mix.  Mix, layer and swirl the colors for fun designs.  I put each color in a large ziploc (like you would for frosting) and cut the corner off, so the girls could just squeeze the cake batter into their baby food jars.  My girls were *very* creative!


4. Place the baby food jars on a cookie sheet and bake the jars (baby food jars are tempered, so they won't have an issue in the oven) for the appropriate cupcake time.  
**The one thing we DID learn, a little to late, is that you CANNOT fill the jars as full as we filled them in the first and second jar in this picture...because it bakes over! LOL!**


5.  With the excess cake batter that baked over, we just lopped it off (leveled it), and set it aside. Set the cupcakes aside to cool, once they have been leveled. 
6.  The final step for the cupcakes is to top with whip and sprinkles.  It made a super cute, super simple cupcake the girls could take home, and was a great serving size!


7.  Since we are girl scouts, we didn't want to wast anything, so once we were done with all the cupcakes, we decided to have a taste of cupcakes - and we took the part we cut off earlier, and added some whip and sprinkles to it! 


I hope you enjoyed this tutorial! If you do this badge, please tell me about it! How did it go - did you do it the same, or tweak it a little? I love hearing about other's experiences. 


March 22, 2016

Mari: Responsible for What I Say and Do - Orange Petal


Welcome to the Daisy Girl's Guide to Girl Scouting! The main focus of this book for our first and second year girls is the Daisy Petal Patch.  Unlike the badge work for older girls, there are not a whole heck of a lot of guidelines for the petal patches.

Petal Activity #1:  Enjoy Mari's story, and talk about it.
Mari's story is in the Girl's Guide to Girl Scouting.  Mari the Marigold is the fifth petal of ten that you will learn about in this guide.  Mari's petal is about learning what being responsible for what I say and do means.  If you don't have the Girl's Guide to Girl Scouting, you can hear it read here by Troop #5007.


Petal Activity #2:  Act out ways to be responsible throughout the day

We had a lot of fun with this one.  When I did this badge, I had first year daisy's, so they were 5 and 6 years old.  The first thing we did was an open discussion. We talked about responsibility, and what it means in general.

  • Responsibility means that you have a job or obligation to take care of something or someone.  It means you can be trusted to do what is right.  It means you are accountable for what you say, do - your behavior and actions. It means you take ownership in your life.  Can you give me examples of what being responsible means?
    • Some of the answers I got were:
      • I take care of my brother
      • I don't lie
      • When I say I am going to clean my room, I *actually* clean it
After this, I separated them into to two groups, and each group talked about responsibility.  We asked them these questions:
  • What are some ways you are responsible every day?
  • What does being responsible for your words mean?  Can words hurt people?
  • Is it important to keep your promises? Why?
  • How are you responsible for your actions?
  • What new thing could you do to show you are responsible?


Petal Activity #3:  Practice being responsible

For this petal activity, we chose to do a craft.  Our girls, like I noted earlier, were 5 and 6 year old kinder's, so I chose something simple and easy to understand.

I came across this blog post - with a GREAT tutorial - my blessed life: Door Hanger Chore Charts.  This tutorial is on a door hanger chore chart, and it very simple.
Photo from: my blessed life
We did modify this a bit - we used foam door hangers from walmart.  They came in a pack of 10 for about $4, and they did not require any painting.  We also divided it horizontally, instead of vertically.  Lastly, we only had four or five chores, simply because our girls were little.

This was a really excellent craft for our girls - it was simple, easy to understand and use, and really got them excited about pitching in at home.  My little lady still uses hers now, over a year later!

We had a great time with this - not many things cuter than 5 and 6 year olds learning about girl scouts!  Tell me how your Mari the Marigold earning went!


March 20, 2016

Arts and Crafts Fun Patch


One of the MANY great things that girl scouts do, is to complete 'fun' patches.  Fun patches are just that - fun.  They technically have no requirements, and you can purchase them through the council, or through a variety of websites - www.snappylogos.com is a go to for us.

When my girls do a fun patch, our troop implements some rules.  This isn't for everyone, but we really like this process.  We choose a patch, and then we choose 3 requirements to go with it.  One requirement must be a hands on activity, one must be education based, and the third can be whatever they wish.

The patch we will talk about in this post is the arts and crafts fun patch.  As a topic, it's pretty open ended, so I looked for something that would be cute and fun to do.

The three requirements chose were: 
- Get excited about art
- Learn how art benefits people
- Make decorative string ornaments

The first thing we did was 'get excited about art.'  We took a trip to the local art museum - Cameron Art Museum, here in Wilmington, NC.  They have this pretty cool event once a month or so called 'Kids at CAM'.  It is an event that takes place on the weekend, usually Saturday, and lasts a few hours.  The museum hosts an artistic event that allows admission by donation - which makes it extremely affordable for everyone, in all income brackets, to attend.  It is an event designed to inspire creativity in art, and every month uses a different medium - from artistic dance, to food design, to paint, and more.  It is a great time for families AND troops, and got my little ladies very excited and pumped up for art!

The next thing we did was talk about the ways that art benefits people - all people.  I asked my girls to answer 3 questions.
  1. How does art help people?
    1. Art helps people in a variety of ways. For small children - ie. toddlers - it helps lay the foundation for their future education.  For school aged children, it helps expand their imagination.  For adults, it can be relaxing and keep their minds sharp.  It also calms people, makes them happy, etc.
  2. How does art help you?
    1. Everyone will have their own personal interpretation to this question.  For me personally, my art is through music, and creating music allows me to focus, and provides great stress relief.  It makes me happy, and content, and gives me a sense of accomplishment. 
  3. In what new way do you think art could help you?
    1. This question will allow your girls to expand upon and build their awareness of the benefits of art.  If they need guidance, you could say something like, Do you think creating art could help build your self esteem? Or, do you think art can help you express yourself?
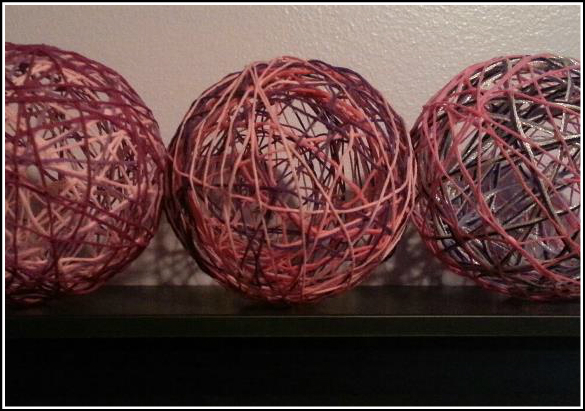
The last thing we did was an art project.  It was simple, yet complex enough for the girls to have a need for focus and concentration.  We made a version of yarn ball ornament, or home decor.  

Supplies:
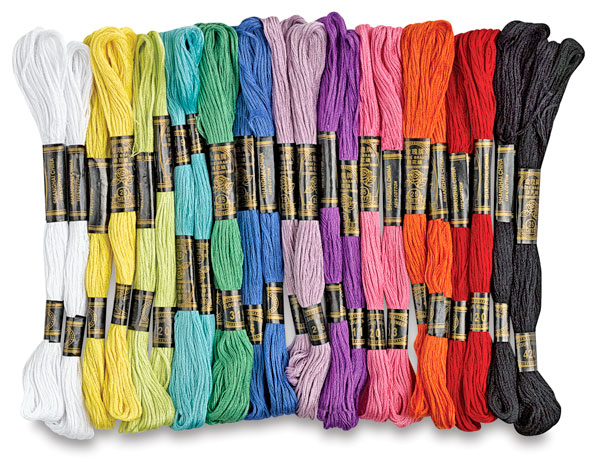
  • Embroidery string
  • Water bottle - one per girl
  • Homemade mod podge (a 1:1 mixture of glue and water)
  • Small 5 in balloons - 9 in balloons are really too much for this. 
  • Cookie sheet lined with parchment paper
  • Drill
  • Tweezers
  1. A value pack of embroidery thread works well for this, because there are many colors available.  Have each girl pick one or two colors.  If they just pick one color, they can use the whole skein, and if they pick two, you'll want to help them get 1/2 skein from each color.
  2. Make home made mod podge.  This is a 1:1 mixture of white glue and water and is simple to make.  As you can see, I took a bottle of white glue, and poured it into an empty water bottle.  Then I filled the glue bottle with water and dumped that in too.  We closed the bottle, and my girl shook it up until it was mixed. I would use about 1/4 c per girl, so each 4 oz bottle of glue should be enough for 4 girls.  You'll want to put 1/4 c in each empty bottle. 
  3. This next step is a *LEADER ONLY* step.  Use the drill to drill a small hole in the lid of each water bottle.  I used a 1/8" bit - it doesn't need to be huge - just big enough for the embroidery string to fit through. When you are finished, hand out the lids to the girls. 
  4. Have the girls wind the embroidery thread around two fingers, and the grab one end.  The other end will be shoved into the bottle - it should look like this photo to the right.  **Only do ONE color at a time - repeat steps 4 and 5 if you are doing more than one color**
  5. Each girl will want to thread the piece hanging out of the bottle through the cap of the bottle.  Then they can secure the lid on the bottle.
  6. Next, blow up a balloon for each girl, and hand them out.  Have them start to draw the string
    out of the bottle, and wrap it around the balloon.  It needs to be wrapped pretty securely - nice and tight, because as it dries, it will loosen.  **Don't tie your starting end to the balloon - just hold it down with your finger, otherwise you will have a struggle to remove the balloon at the end.
  7. When you come to the end of the string, just lay it down on the balloon - you wont be able to tell where it begins and ends once it dries.  Everyone can place their balloon on a lined cookie sheet to dry for 24 hrs.  You'll want to rotate them every six hours so they don't end up with any flat sides.
  8. Once they are completely dry, gently pop the balloon, and draw it out with a tweezers.  The end result is a super cute thread ball, that can be placed in a bowl, on a shelf, or hung from the ceiling. 

These took concentration, and sometimes caused failures.  This was good though - while you are working with wet materials, they are very pliable, and easily fixed. Its a good thing for the little ladies to encounter struggle and figure out how to get through it.  In the end, they were all very proud of their decor, and seemed to really enjoy the process.


This craft can *also* be used to complete one of the 4 requirements from the girl guide Craft badge!


If you have any questions, please let me know! I hope your troops enjoy this patch work.  If you try it out, please let me know how it turns out and how you tweaked it to fit your troop! 


Follow my blog with Bloglovin